Being able to group your digital signage displays is a great skill for efficient screen management. By grouping your screens, you can easily manage content by location, industry, or type. This is a great feature for larger organisations or users with large digital signage networks. It’s an extremely easy feature to use and is bound to save you time regarding screen management in the long run.
After reading this blog, you’ll know how to use the screen grouping feature on the TrouDigital online studio. Let’s begin!
1. Login and Navigate to the ‘Screens’ Tab
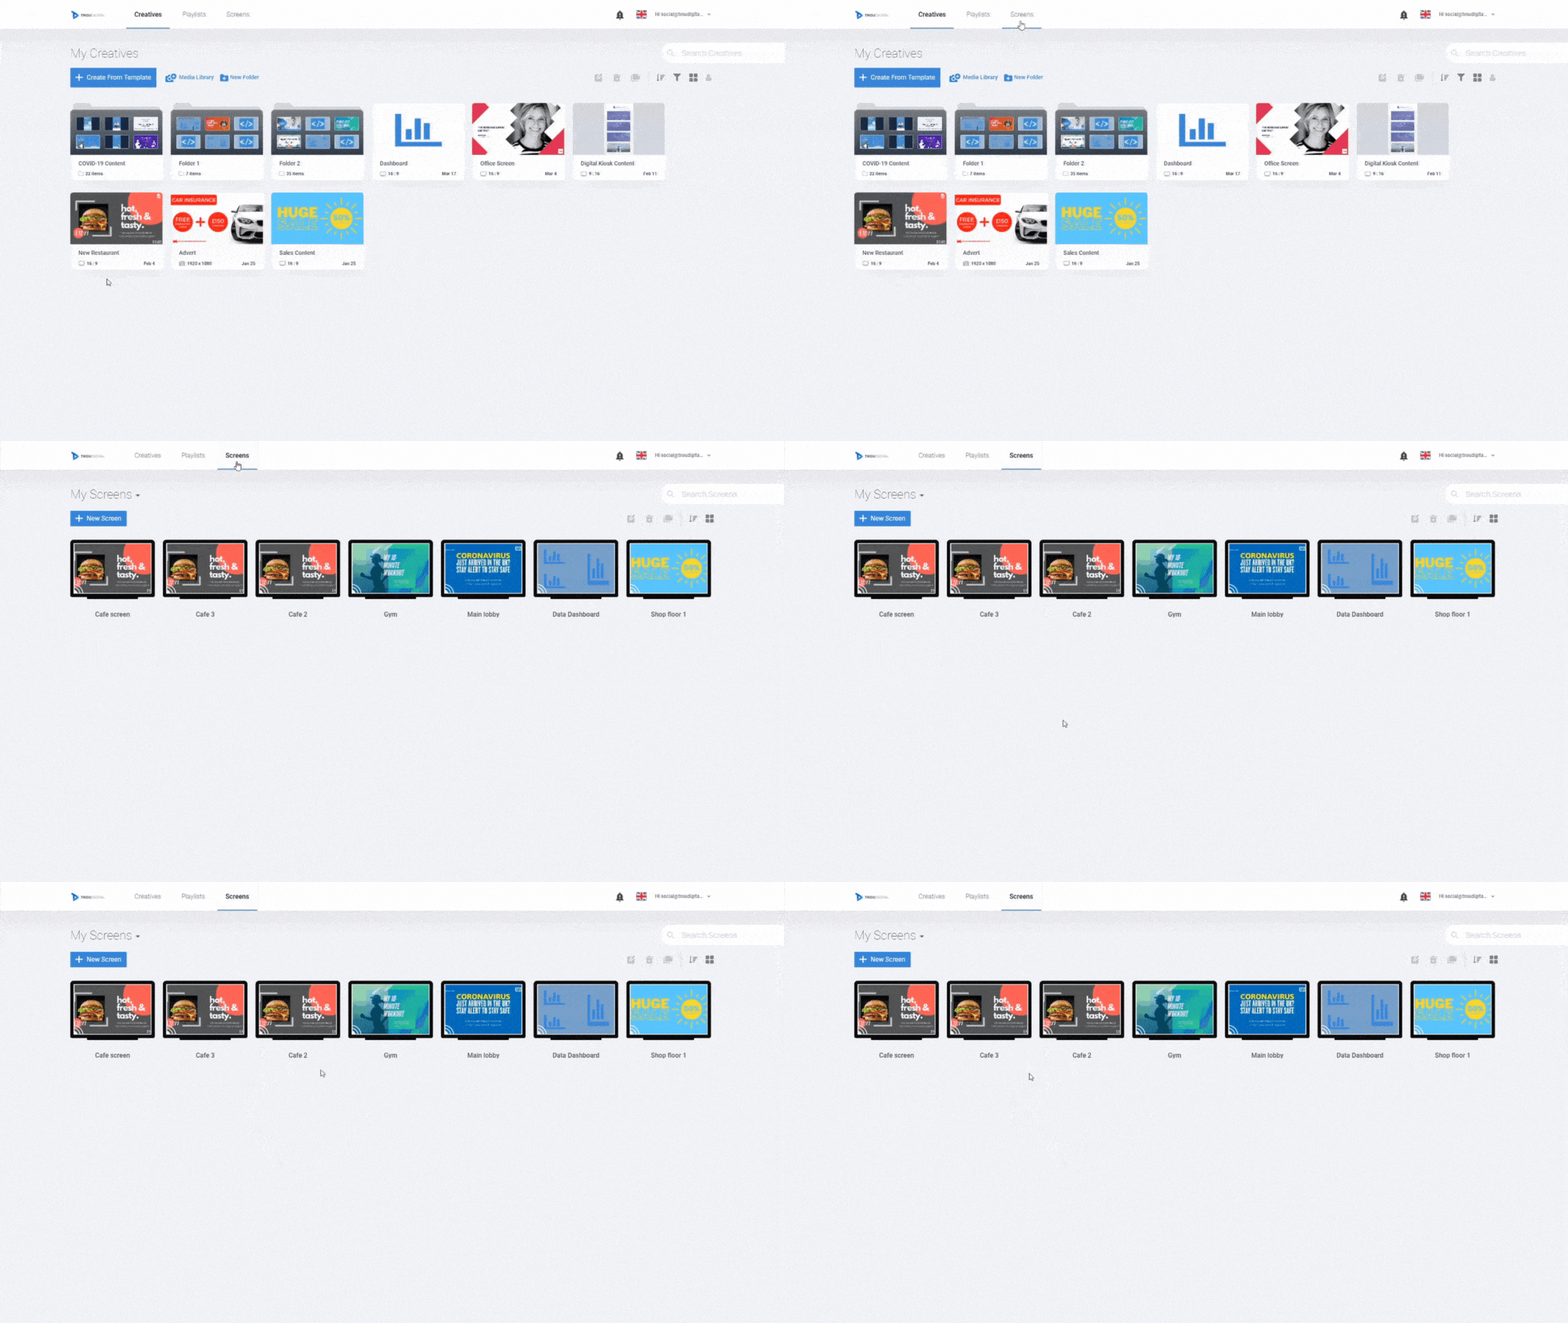
To access the screen grouping options you’ll need to log in to your TrouDigital account at troudigital.com. Or log in using this link. Once you have successfully logged in, click on the screens tab.
You should be able to see all your active digital signage displays.

2. Access the ‘Groups’ Page
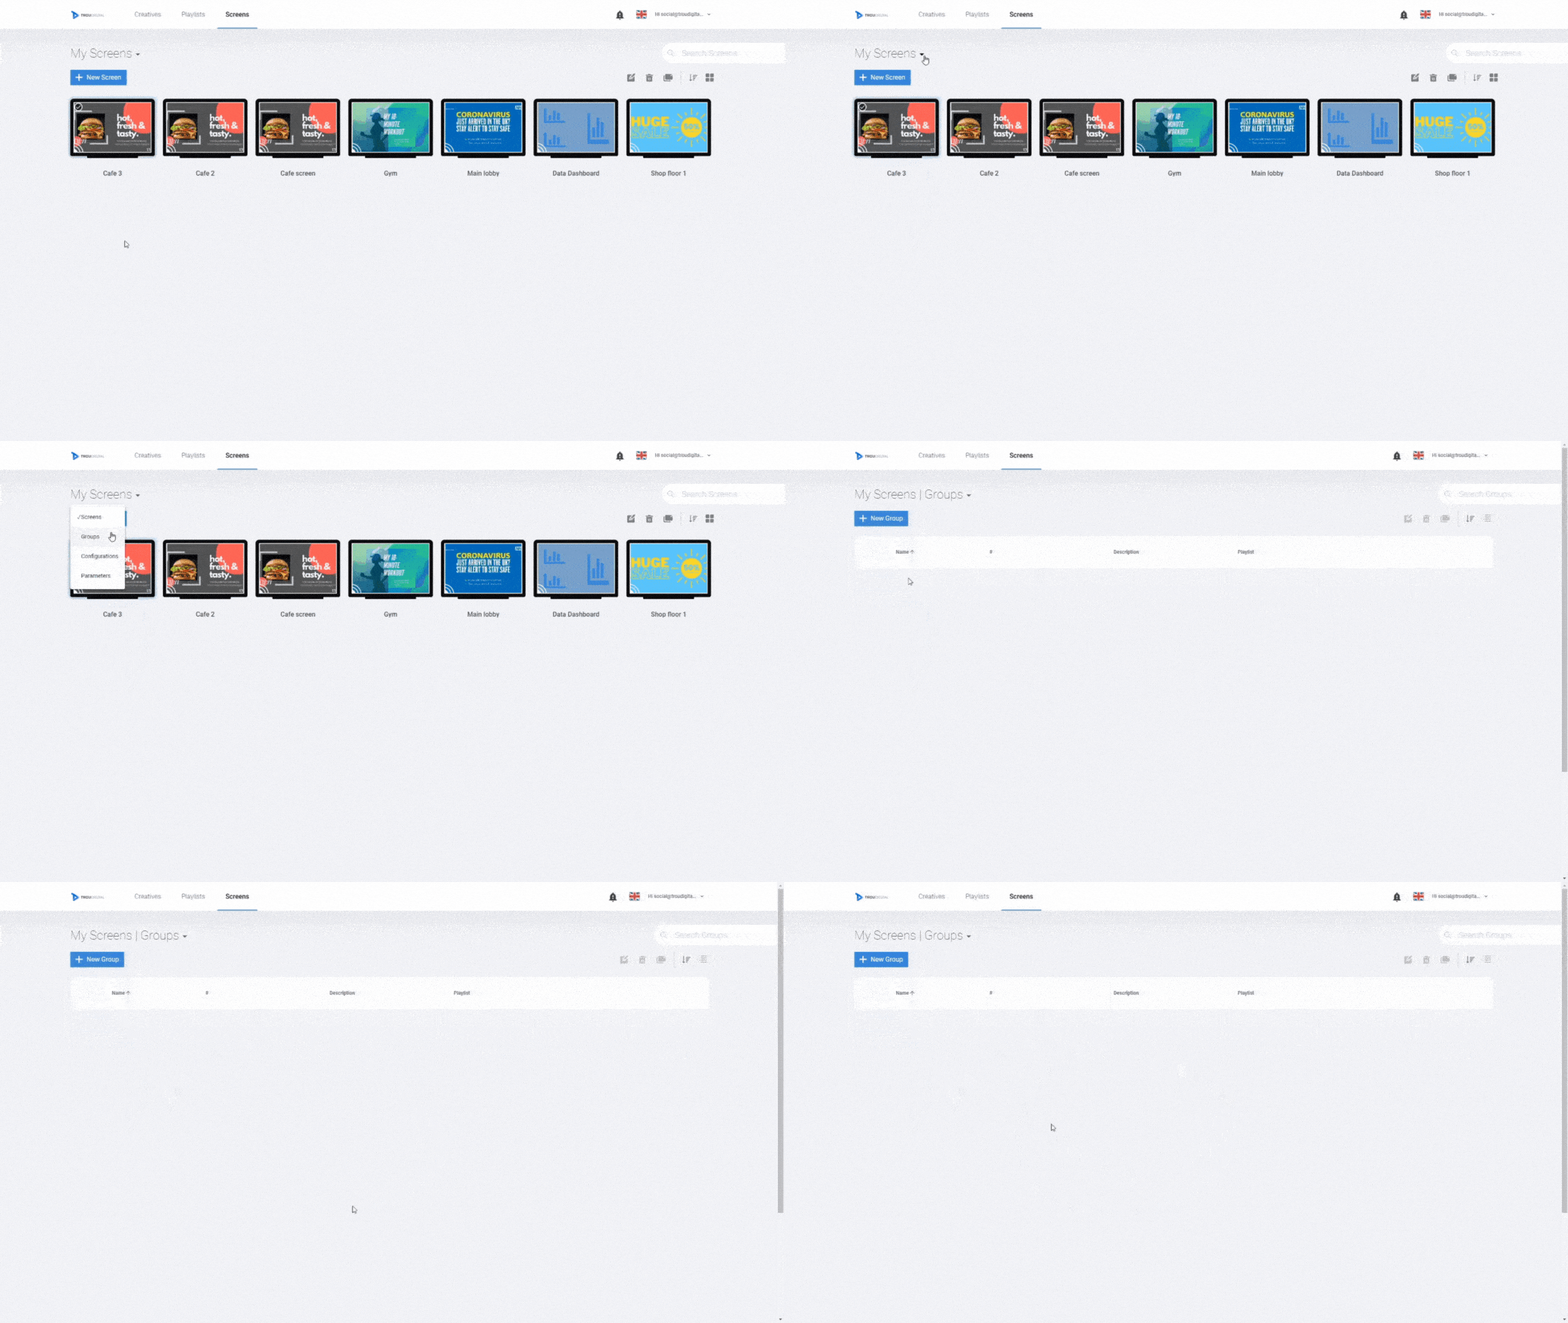
Click the small drop-down arrow next to the ‘My Screens’ text. Then, click the ‘Groups’ option. If successful, you’ll be taken to the ‘Groups’ Page.
The ‘Groups’ page is where you’ll be able to see all your screen groups. Once we’ve populated this page you can edit, control, and delete chosen groups.

3. Adding a New Group
Now we’re going to show you how you add screen groups to the studio.
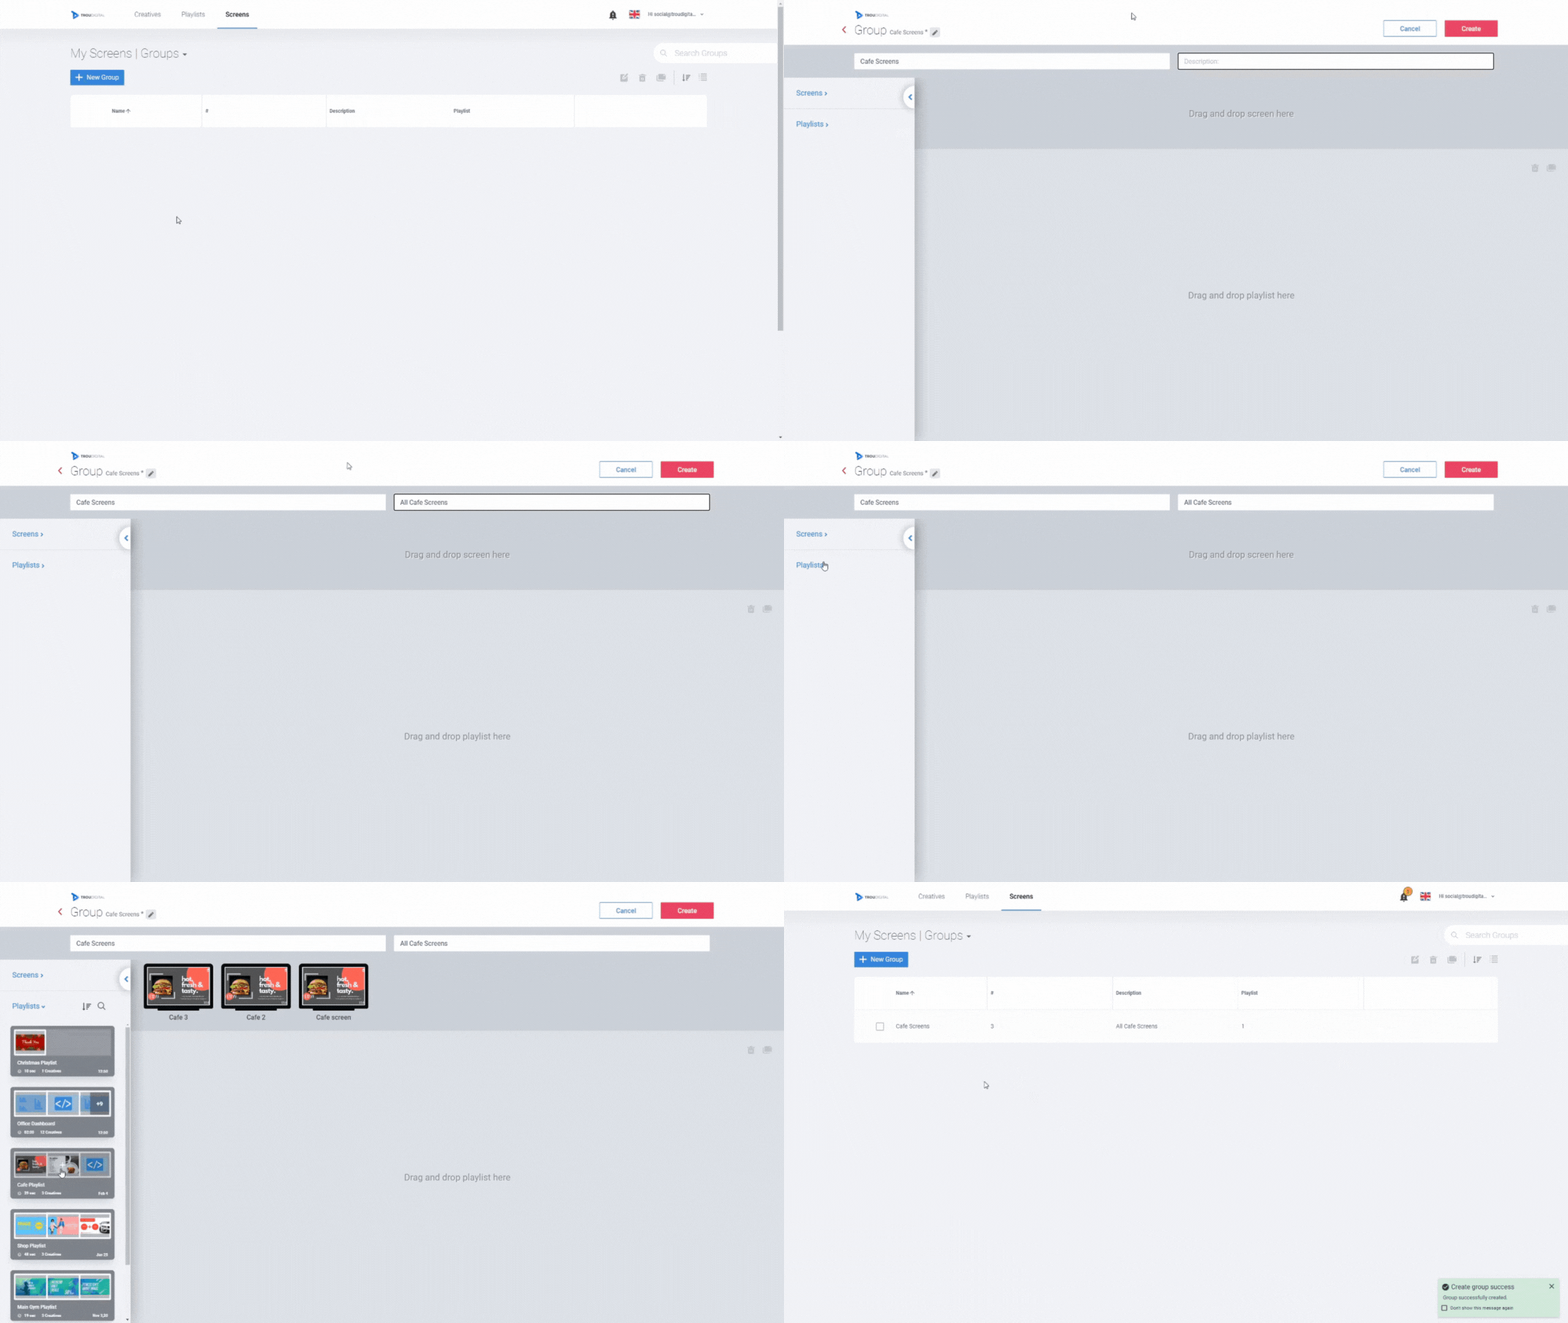
First, click the blue ‘+ New Group’ button. You can enter a name for the group and a description if you wish. If you are grouping screens by location it’s good practice to name the screen group after a chosen location. In the example, the screens in this group are all for Cafes, so we’ve called the group ‘Cafe Screens’.
Clicking either ‘Screens’ or ‘Playlists’ will allow you to add screens or playlists to the group. First, add the screens you wish to be part of this group by hovering over your desired screen and pressing the plus icon. Then, apply the playlist you want to deploy to this screen group by hovering over the desired playlist and pressing the plus icon. You will see your screen group page start to populate.
Once you’re happy with your screens, press create. Your group will be created and you’ll be redirected to the ‘Groups’ page. From here, you can see the groups you have previously created.

And that’s it. It really is that simple. You’ve just learned how to group digital signage displays with TrouDigital. All the screens within your chosen group will display the same playlist.
If you have any questions regarding how to group digital signage displays, speak to an expert today. Call our friendly team on 02380 981110 or Email info@troudigital.com for a no-obligation consultation. Alternatively, click the button below.
